About Me

My photo
Some facts about us: Together since May 2004, Matt & Kristin Married in May 2009. Between the two of us, we've lived in California, Hawaii, Guam, Japan and met here, in good ol' Virginia. We adopted two mini schnauzers, Hemingway & Mya aka The Pups. We bought our first home in May of 2011 and are ridiculously excited for all the DIY projects ahead of us.
Showing posts with label kitchen. Show all posts

Friday, July 29, 2011

Light Fixture Update

The evolution of the eat-in kitchen light fixture.  This isn't a how-to since I didn't document as we changed up the feel in our most-used room.  But it's still an upgrade I wanted to share. 

We started with the old school, gold trim with textured glass light fixture; ancient and not our style.  I wanted it down so badly, I forgot to take a before picture.  So in a lame, I'm-too-lazy-to-put-back-up-for-a-stinkin'-picture, I held it up and snapped this quick shot.


I had found that white light bowl just lying around the house when we were moving in, so I replaced the clear textured glass with it.  It was a temporary fix until we found the perfect fixture.


Now the search...  Ikea.com is a dangerous place to browse as it will turn into hours of "must have"-ing and shopping-list-creating.

That's when I found this:
KNAPPA Pendant lamp, white Diameter: 18 " Height: 14 ΒΌ " Cord length: 15 ' 5 "  Diameter: 46 cm Height: 36 cm Cord length: 4.7 m
It's their KNAPPA Pendant Lamp and it was perfect for our fun eat-in-area.  I figure we're young enough that we can still toy around with things a little less than grown up, but still stylish and modern.

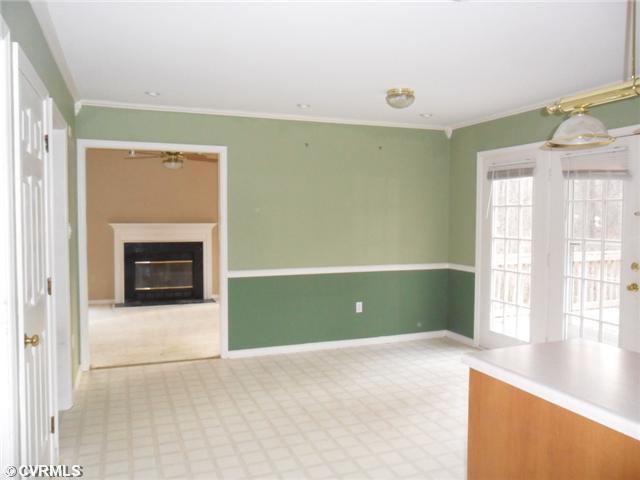
So here's a quick Waaaay Before:

And then a Right Before:

...and a Now:

I wasn't sure the hubs was going to be "in" on the whole flower looking light fixutre, but he actually really likes it for the space.  Score!... because I love it.

We plan on getting a smaller square table for this area since this one's just a wee-bit too big.  Don't fret, we're moving the big boy into the formal dining room once we get the smaller set.  Mismatched chairs and oversized tables are not my idea of dream kitchen area, so eventually this will be done.  Eventually, as in, when we're done with other more important upgrades, some travel plans and saving more moola.

Sheesh.

Wednesday, June 1, 2011

Green with Envy

Envious for a new color pallette that is. 
The eat in kitchen nook colors were OK, but we wanted to spice it up a bit.  We loved the chair rail, so decided to still keep the double tones.

We started with the all around color of the kitchen and top of the nook.  We went with a soft blue (I'll get exact color names soon!)  As for the stripes, originally we were going to do white and tan stripes, but found extra paint leftover from the previous owners.  It was the grey from the master bath.  Blue + grey = Love.


 After Matt went over the green with two coats of the Behr paint, we let it dry over night before I added the white stripes.

What I used:  level, 2 different size envelopes, pencil and painters tape
 Instead of using measuring tape, I used two different size envelopes (junk mail) to measure the chunky grey stripes and thinner white striped area.  That's right, very sophisticated junk mail.  I'm a regular Picasso when it comes to painting.


 After drawing the striped lines in, I used painters tape to line the outside of the grey stripes so I could paint the white stripes in.
Then I painted a couple of coats of white paint and took the painters tape off before it dried all the way(always pull off at an angel, away from the new paint).

DRUM ROLL PLEASE...

Ahhhhh... much better.

There you have it, my first time painting stripes!  PS the stripes were Matt's idea.  Genius!